Enable ChatGPT Instant Checkout for WooCommerce Stores
Etsy and Shopify stores got early access to ChatGPT Shopping through OpenAI’s Agentic Commerce Protocol. WooCommerce stores couldn’t join until now.
If you run a U.S.-based WooCommerce store, you can now sell directly through ChatGPT conversations. Shoppers discover your products, ask questions, and complete purchases without leaving the chat interface.
This guide walks through the five-step setup process using our AI Checkout for WooCommerce plugin, from installation to your first ChatGPT order.
What ChatGPT Instant Checkout Does
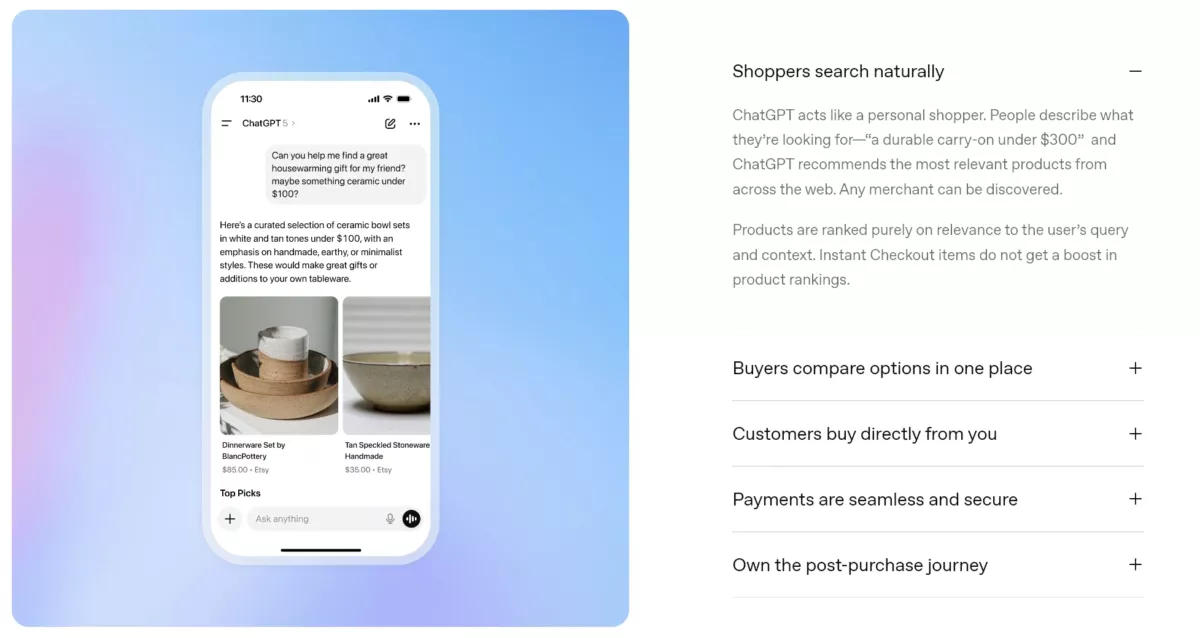
ChatGPT Instant Checkout runs on the Agentic Commerce Protocol (ACP), OpenAI and Stripe’s open standard for connecting stores to AI platforms. Your WooCommerce products appear in ChatGPT with full details: images, pricing, descriptions, and variants.
Customers browse your catalog through natural conversation. “Show me hoodies under $50” returns your matching products with purchase options.
Current Access Requirements
ChatGPT Shopping is limited to verified U.S. merchants who use Stripe for payment processing. You must apply for OpenAI’s merchant verification and get approved before going live.
The AI Checkout plugin includes test mode with Stripe test keys and sample ChatGPT orders. You can verify your complete integration works before applying for merchant status.
Prerequisites
Before installation, verify these requirements:
Active SSL certificate (HTTPS): Your site must use HTTPS for secure communication between OpenAI and Stripe.
WooCommerce Stripe Gateway: Required for payment authorization. The official WooCommerce Stripe extension handles 3D Secure verification and payment processing.
Stripe account: OpenAI chose Stripe as the first payment partner for ACP. Other providers will be added later, but Stripe is currently the only option for live transactions.
Why OpenAI Requires Merchant Verification
OpenAI vets merchants before enabling live ChatGPT orders. The verification process checks your business legitimacy, privacy policy, terms of service, and store details.
Test mode lets you complete the entire setup and verify everything works before submitting your application. We recommend using the plugin’s wizard in test mode first, it catches configuration issues early.
Step 1: Install AI Checkout for WooCommerce
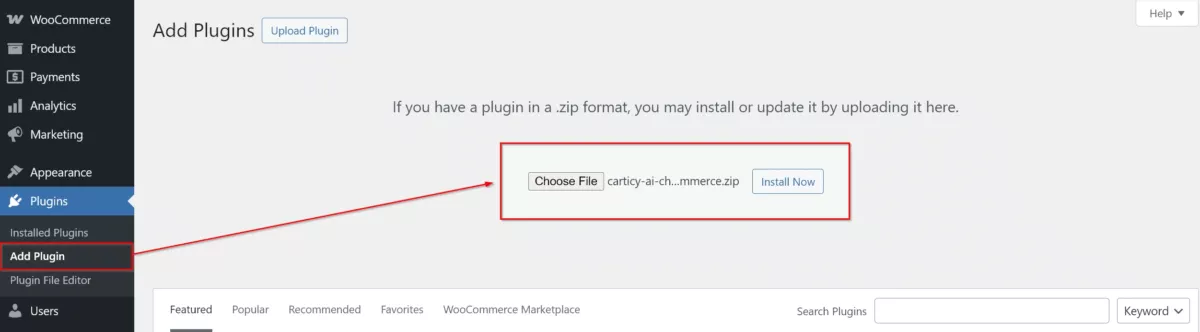
Download the plugin AI Checkout for WooCommerce from the WordPress plugin repository. You can also install from you WordPress Dashboard by navigating to Plugins > Add New, search for “AI Checkout for WooCommerce,” click “Install Now,” then activate the plugin.
Activation creates five API endpoints that OpenAI uses to communicate with your store: product retrieval, order creation, inventory checks, order updates, and merchant information. These endpoints handle all ChatGPT traffic separately from your main site.
Step 2: Configure Stripe Payment Gateway
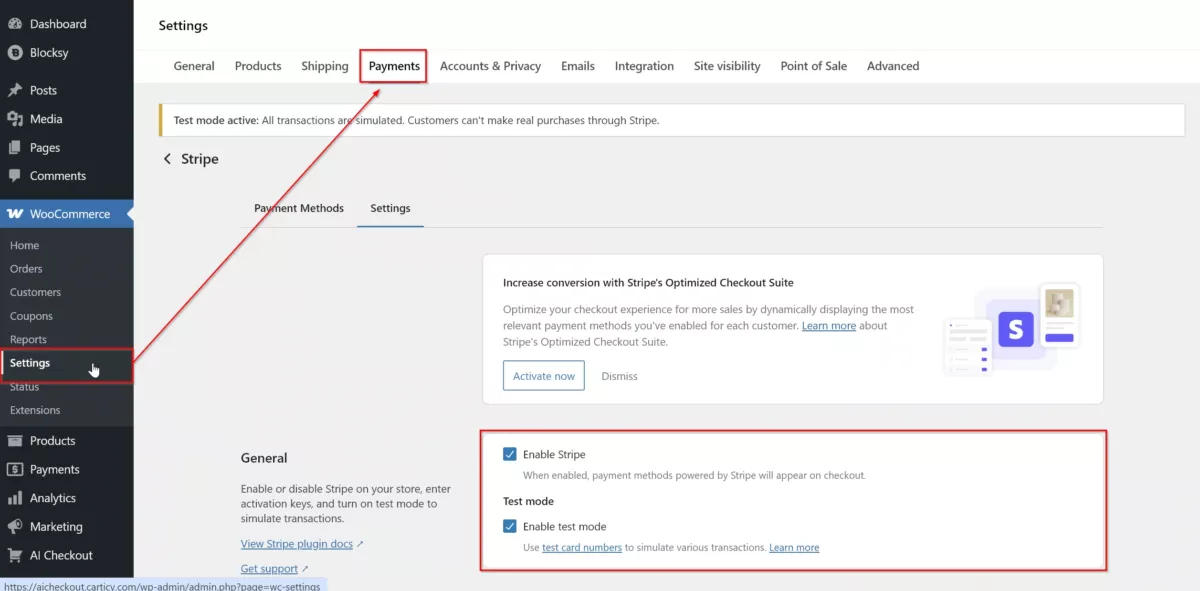
ChatGPT orders require Stripe for payment processing. Install the official WooCommerce Stripe Gateway plugin if you haven’t already, many stores already use this for regular payments.
Navigate to WooCommerce > Settings > Payments. Click “Set up” or “Manage” next to WooCommerce Stripe Gateway and follow the prompts to connect your Stripe account.
The setup wizard guides you through the connection process. For test mode, configure test keys in the Stripe settings. For live payments, complete the live connection flow.
AI Checkout automatically connects to your configured Stripe Gateway, no additional payment setup needed. When customers check out through ChatGPT, payments process through your existing Stripe integration with 3D Secure verification included.
Step 3: Configure Your Product Feed
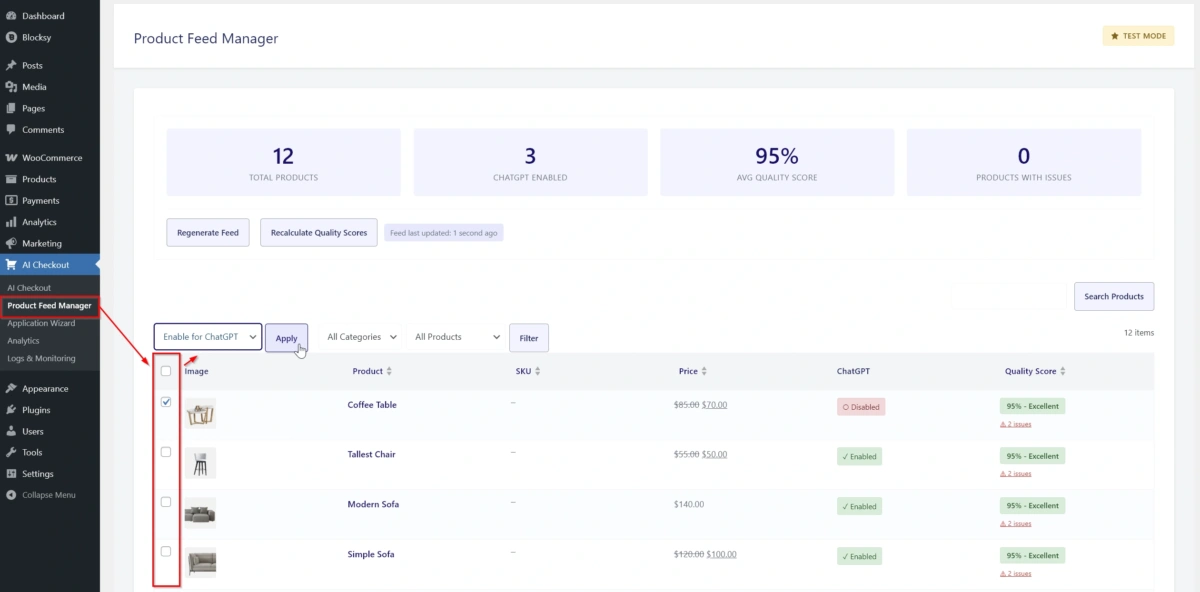
Navigate to AI Checkout > Product Feed Manager. This interface shows all your WooCommerce products with quality scores that indicate how well each product’s data works for ChatGPT display.
The quality score checks for complete product information: images, descriptions, pricing, and stock status. Low scores indicate missing or incomplete data that should be fixed before enabling.
Select products using the checkboxes, choose “Enable for ChatGPT” from the dropdown, and click Apply. You can enable all products at once or start with specific categories and best-sellers.
The feed regenerates automatically when you enable or disable products. ChatGPT sees your changes within 15 minutes. Click “Regenerate Feed” to force an immediate update if needed.
Review products marked with issues, these typically need images added or descriptions completed before they’ll display properly in ChatGPT conversations.
Step 4: Complete the OpenAI Application Wizard

Navigate to AI Checkout > Application Wizard. The wizard walks through nine steps to prepare your OpenAI merchant application:
Enter your business information, verify your product feed is configured, confirm your policies are in place, and check data quality scores. The Prerequisites step automatically verifies WordPress version, WooCommerce, Stripe Gateway, SSL certificate, and API keys.
Step 6 from the wizard configures your test environment, test mode enables automatically, allowing you to run conformance tests safely before going live.
Step 8 from the wizard runs the ACP Conformance Tests. Click “Run All Tests” to verify your integration passes all required checks: session creation, payment processing, order completion, and webhook delivery. All tests must pass before you can submit your application.
Once tests pass, the final step provides you with instructions to submits your application to OpenAI for merchant verification.
Step 5: Submit Your OpenAI Merchant Application
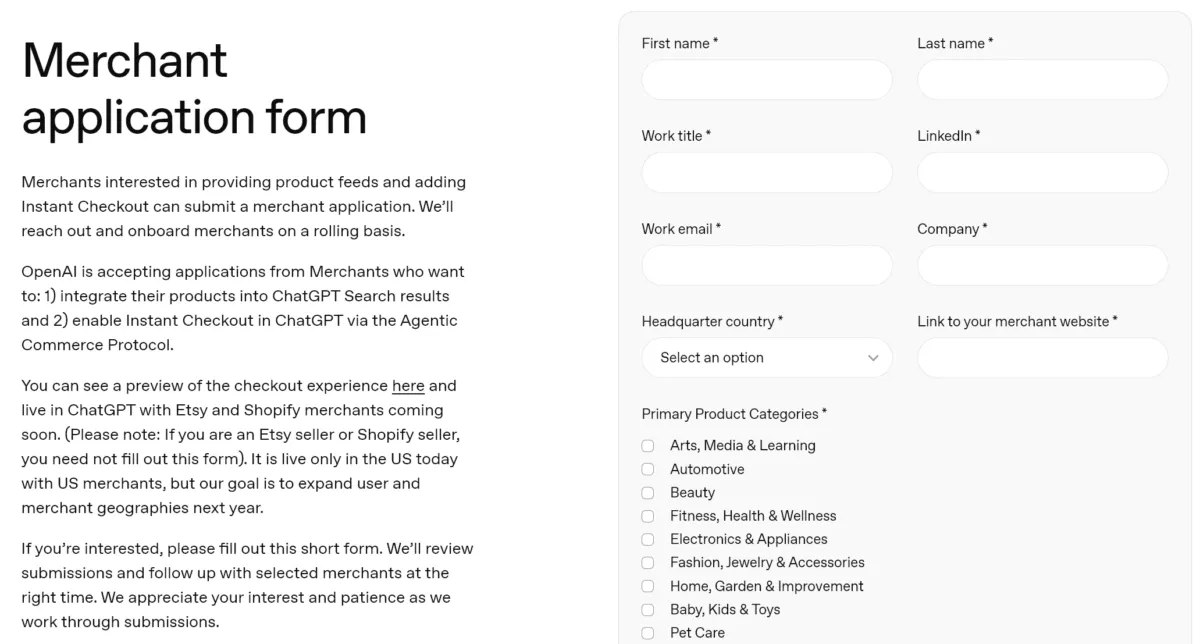
After all conformance tests pass, Step 9 from the wizard will shows your complete application summary. Review your business information, verify all requirements are met, and click “Submit Application to OpenAI.”
This opens OpenAI’s merchant application form where you’ll provide contact details, company information, and product categories. The form uses the data you configured in the wizard.
Getting OpenAI approval is the most challenging part. Verification typically takes 3-7 business days, though it can take longer depending on application volume. OpenAI reviews each application manually.
You can apply for merchant verification before installing the plugin or after setup, the order doesn’t matter. Some merchants get approved first, then install and configure. Others prefer testing the integration before applying.
Going Live After Approval
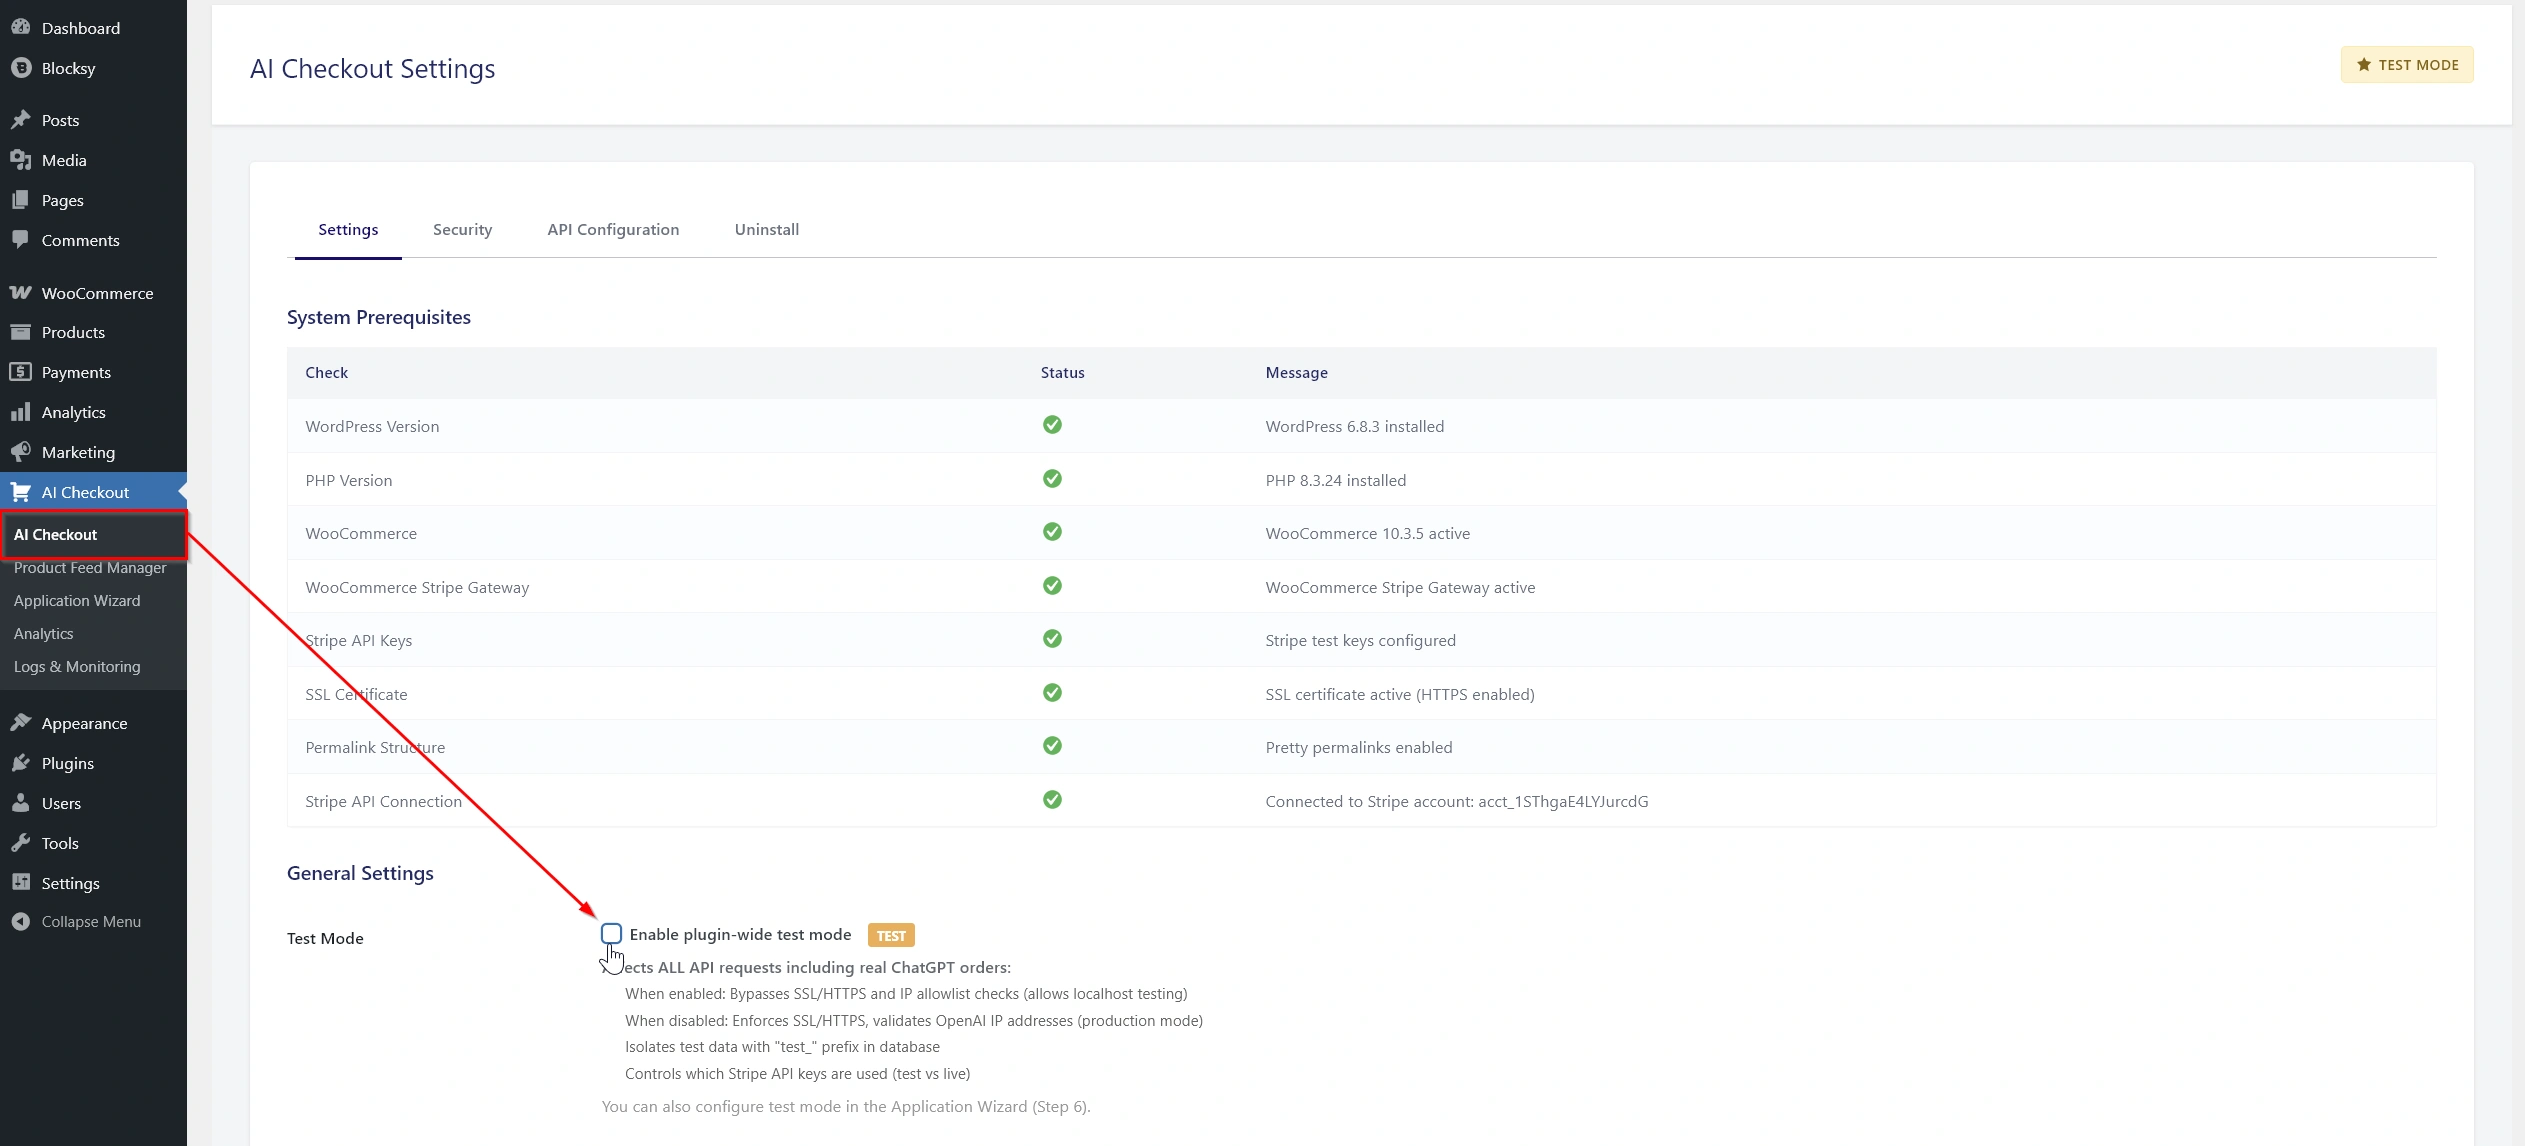
Once OpenAI approves your merchant application, navigate to AI Checkout > AI Checkout and disable test mode. Your products become discoverable in ChatGPT immediately.
ChatGPT orders appear in WooCommerce > Orders with a “ChatGPT Checkout” label. Order fulfillment, inventory management, and shipping work exactly as configured in WooCommerce, the plugin passes order data through your existing settings without modification.
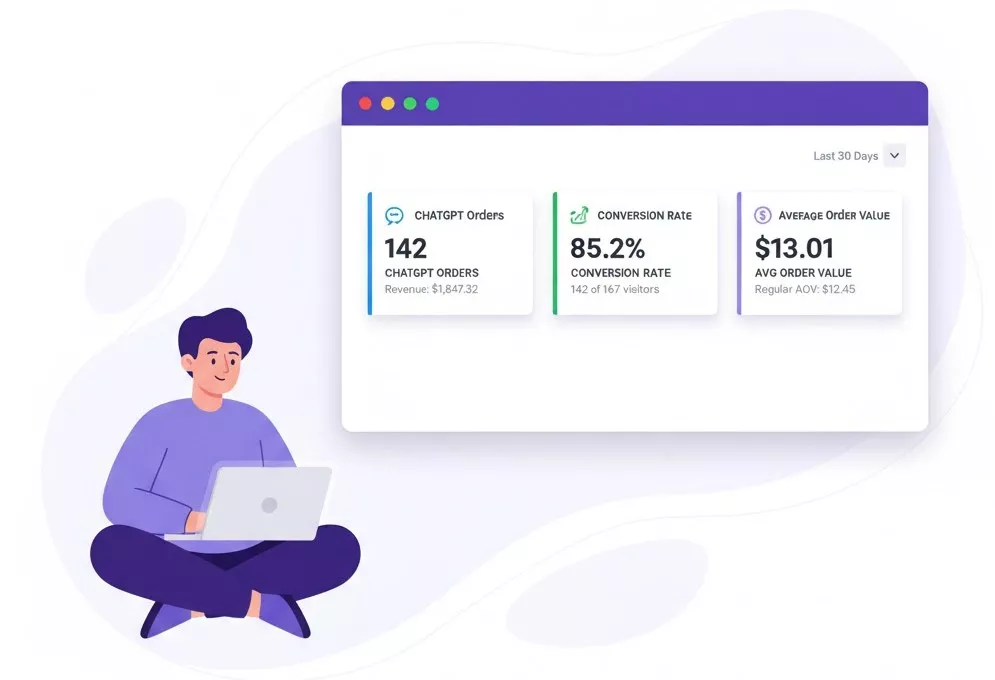
The AI Checkout > Analytics page tracks ChatGPT-specific performance: total orders, revenue, conversion rates, and average order values from your ChatGPT sales channel.
About the Author

Table of Contents
- What ChatGPT Instant Checkout Does
- Current Access Requirements
- Prerequisites
- Why OpenAI Requires Merchant Verification
- Step 1: Install AI Checkout for WooCommerce
- Step 2: Configure Stripe Payment Gateway
- Step 3: Configure Your Product Feed
- Step 4: Complete the OpenAI Application Wizard
- Step 5: Submit Your OpenAI Merchant Application
- Going Live After Approval