Checkout Shield for WooCommerce
Your CAPTCHA protects the form. This protects the API. Most store owners don't realize the attacks aren't even hitting their checkout page.
Checkout Shield Requirements & Installation
Use this guide to install Checkout Shield for WooCommerce and confirm that the store is ready before enabling checkout protection.
Requirements
- WordPress 6.0 or newer.
- WooCommerce 8.0 or newer.
- PHP 8.0 or newer.
- Administrator access to WordPress and WooCommerce settings.
Install the plugin
- Download the Checkout Shield ZIP file from your Carticy account.
- In WordPress, go to Plugins > Add New Plugin > Upload Plugin.
- Choose the ZIP file, install it, then click Activate.
- Confirm that WooCommerce is active before configuring protection.

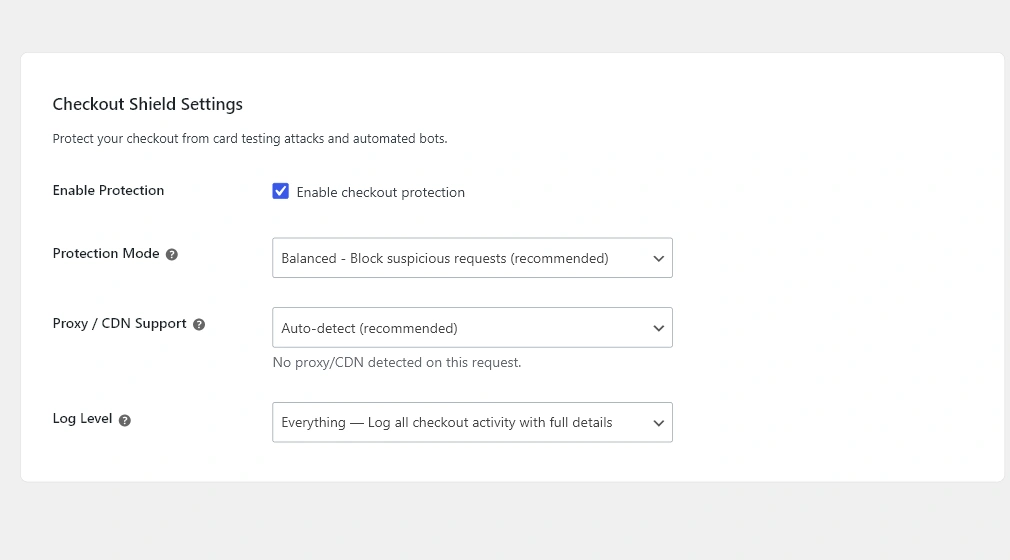
Find the settings
After activation, go to WooCommerce > Settings > Advanced > Checkout Shield. This page contains the protection mode, proxy/CDN handling, log level, IP whitelist, and API key controls.
Before enabling protection
If your store uses a CDN, reverse proxy, cache plugin, or custom checkout, start in Learning mode first. This lets Checkout Shield observe checkout traffic before it blocks suspicious requests.
Next steps
Enable protection with the recommended setup: Quick Start: Recommended Protection Setup. Then learn the modes in Protection Modes Explained and verify safely in Testing Checkout Protection Safely.